Mysql8.0.17压缩包安装——超详细简单教程
来源:https://blog.csdn.net/qq_38264999/article/details/98858903
一、Mysql下载
压缩包下载:https://dev.mysql.com/downloads/mysql/
MSI下载:https://dev.mysql.com/downloads/windows/installer/8.0.html
个人推荐压缩安装,Msi安装如果出现错误,容易安装失败。

二、Mysql安装
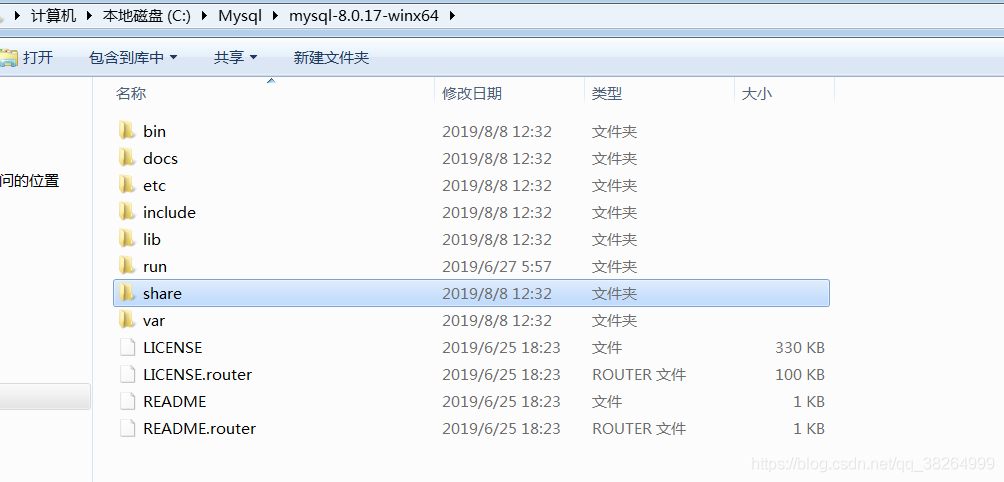
2.1、将文件解压到合适的目录下,个人比较喜欢放在D盘,文件夹路径最好纯英文,中文可能出现意想不到的问题。

2.2、配置my.ini文件,只需要配置basedir即可,根据自己解压路径配置。
- [mysql]
- # 设置mysql客户端默认字符集
- default-character-set=utf8
-
- [mysqld]
- # 设置3306端口
- port = 3306
- # 设置mysql的安装目录
- basedir=C:\\Mysql\\mysql-8.0.17-winx64
- # 设置 mysql数据库的数据的存放目录,MySQL 8+ 不需要以下配置,系统自己生成即可,否则有可能报错
- # datadir=C:\\Mysql\\mysql-8.0.17-winx64\\data
- # 允许最大连接数
- max_connections=20
- # 服务端使用的字符集默认为8比特编码的latin1字符集
- character-set-server=utf8
- # 创建新表时将使用的默认存储引擎
- default-storage-engine=INNODB
注意:windows默认新建的是txt文件,需要修改后缀名为 ini。
2.3、以管理员身份打开命令行,将目录切换到你解压文件的bin目录。

2.4、初始化Mysql,Mysql8.0之后自动生成data文件夹。
- mysqld --initialize-insecure (建议使用,不设置root密码)
-
- //生成的密码在实际连接的时候可能会不小心输入错误或忘记,导致无法连接Mysql
- mysqld --initialize --console(不建议使用,在控制台生成一个随机的root密码)

2.5、安装mysql
- //安装mysql服务
- mysqld install mysql
-
- //卸载mysql服务
- sc delete mysql(需要管理员权限)
-
- //移除mysql服务(需要停止mysql)
- mysqld -remove
执行命令成功后一般会出现Service successfully installed

2.6、开启Mysql服务
net start mysql 
2.7、登录Mysql
mysql -uroot2.8、设置(修改)密码
- //切换数据库
- use mysql;
-
- //修改root用户的密码为225514,根据需要自己设置
- alter user ‘root‘@localhost identified by ‘225514‘;
-
- //刷新权限,一般修改密码或授权用户的时候需要使用
- flush privileges;
-
- //推出mysql,两个都可以正常退出数据库
- quit
- exit

注意:Mysql8.0之后修改密码的方式无法使用password函数 !
2.9、重新登录数据库
- //回车后,输入正确的密码即可正常
- mysql -uroot -p
2.10、配置PATH路径,任意位置打开cmd都可以连接Mysql

三、Mysql8.0碰到的坑
3.1、使用Navicate连接数据库可能会出现的问题
连接报错如下Client does not support authentication protocol requested by server,Navicat 12版本之后不会报错。
mysql8.0 引入了新特性 caching_sha2_password;这种密码加密方式客户端不支持;客户端支持的是mysql_native_password 这种加密方式;
查看加密方式:
select host,user,plugin from user;
修改root用户的加密方式:
alter user ‘root‘@localhost identified with mysql_native_password BY ‘225514‘;注意:一般升级下Navicate的版本即可,不建议修改加密方式。
3.2、加密方式的讲解。
caching_sha2_password as the Preferred Authentication Plugin(caching_sha2_password作为首选身份验证插件)
The caching_sha2_password and sha256_password authentication plugins provide more secure password encryption than the mysql_native_password plugin, andcaching_sha2_password provides better performance than sha256_password. Due to these superior security and performance characteristics of caching_sha2_password, it is as of MySQL 8.0 the preferred authentication plugin, and is also the default authentication plugin rather than mysql_native_password. This change affects both the server and the libmysqlclient client library。
翻译:该caching_sha2_password和 sha256_password认证插件提供比更安全的密码加密mysql_native_password插件,并 caching_sha2_password提供了比更好的性能sha256_password。由于这些优越的安全性和性能特征 caching_sha2_password,它是MySQL 8.0的首选认证插件,也是默认的认证插件而不是 mysql_native_password。此更改会影响服务器和libmysqlclient客户端库。
3.3、添加外网访问权限
- //切换数据库
- use mysql
- //更新用户的host
- update user set host=‘%‘ where user=‘root‘;
- //授权
- grant all privileges on *.* to ‘root‘@‘%‘ with grant option;
- //刷新
- flush privileges;
3.4、创建用户waggag并授远程访问权
| 创建用户 |
|
| 授予权限 |
|
| 刷新权限 |
|
