Heartbeat部署
部署环境:CentOS 7
1、Heartbeat介绍
Heartbeat是Linux-HA项目中的一个组件,它实现了一个高可用集群系统。心跳检测和集群通信是高可用的两个关键组件,在Heartbeat项目中,由heartbeat模块实现了这两个功能。Heartbeat是目前开源HA项目中十分成功的例子,提供了所有HA软件所需要的基本功能,比如心跳检测和资源接管、监测集群中的系统服务、在集群中的节点间转移共享IP的所有者。从1999年开始至今,Heartbeat在行业内得到了广泛应用。心跳检测可以通过网络连接和串口进行,而且支持冗余链路,它们之间相关发送报文以告知对方自己当前状态,如果在指定的时间内未收到对方发送的报文,则认为对方失效,此时启动资源接管模块来运行在对方主机上的资源或者服务。
2、环境说明
节点1:node1 node1.heartbeat.com 192.168.6.192
节点2:node2 node2.heartbeat.com 192.168.6.193
vip地址:node2.heartbeat.com 192.168.6.190
3、部署测试对象
以部署httpd服务为例,在节点1(192.168.6.192)上部署验证对象。
1)安装httpd服务
yum install httpd
2)开启http服务
systemctl start httpd.service
3)测试
- 测试方法一:用curl命令测试,执行curl命令能请求的网页内容,则说明服务部署成功。
curl 192.168.6.192 (或 curl 127.0.0.1)
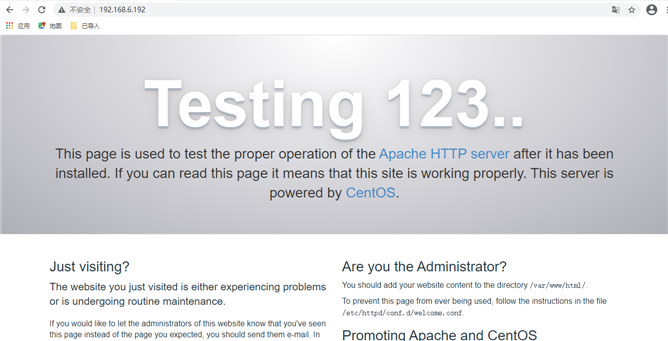
- 测试方法二:用浏览器测试。开放80端口,供远程访问。然后打开浏览器,输入http://192.168.6.192,如能打开如下所示页面时,说明远程访问配置完成。
firewall-cmd --zone=public --add-port=80/tcp --permanent
systemctl restart firewalld.service
4)创建HA测试页面
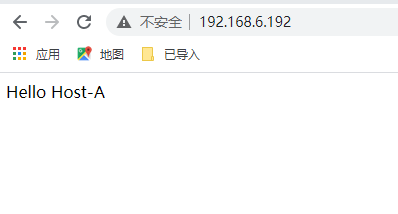
在/var/www/html/目录下创建index.html页面,输入内容Hello Host-A,刷新浏览器,显示如下,则说明测试页面成功运行:
5)关闭httpd服务。
systemctl stop httpd.service
同理,安装上述步骤,在节点2上部署httpd服务(注意:在步骤4中,将测试页面内容改为Hello Host-B)。
4、安装Heartbeat模块
注意:用 root 用户操作。
4.1 前提工作
在两个节点上进行如下工作:
- 关闭firewalld
- 关闭selinux
- 同步时间
- 配置主机名
- 配置主机间ssh互信,免密钥认证
节点1配置操作:
systemctl stop firewalld
systemctl disable firewalld
setenforce 0
sed -i s#SELINUX=enforcing#SELINUX=disabled# /etc/selinux/config
ntpdate 10.0.0.100
hostname node1.heartbeat.com
echo "node1.heartbeat.com" >> /etc/hostname
ssh-keygen -q -t rsa -N ‘‘ -f ~/.ssh/id_rsa
ssh-copy-id root@192.168.6.193
echo -e "192.168.6.192 node1.heartbeat.com node1\n192.168.6.193 node2.heartbeat.com node2" >> /etc/hosts
节点2配置操作:
systemctl stop firewalld
systemctl disable firewalld
setenforce 0
sed -i s#SELINUX=enforcing#SELINUX=disabled# /etc/selinux/config
ntpdate 10.0.0.100
hostname node2.heartbeat.com
echo "node2.heartbeat.com" >> /etc/hostname
ssh-keygen -q -t rsa -N ‘‘ -f ~/.ssh/id_rsa
ssh-copy-id root@192.168.6.192
echo -e "192.168.6.192 node1.heartbeat.com node1\n192.168.6.193 node2.heartbeat.com node2" >> /etc/hosts
4.2 部署Heartbeat
在节点1和节点2上均完成如下安装工作:
- 安装基础环境
yum install gcc gcc-c++ autoconf automake libtool glib2-devel libxml2-devel
yum bzip2 bzip2-devel e2fsprogs-devel libxslt-devel libtool-ltdl-devel asciidoc
- 创建用户和组
groupadd haclient
useradd -g haclient hacluster
- 下载软件包:
Reusable-Components-glue、resource-agents、heartbeat
wget http://hg.linux-ha.org/heartbeat-STABLE_3_0/archive/958e11be8686.tar.bz2
wget http://hg.linux-ha.org/glue/archive/0a7add1d9996.tar.bz2
wget https://github.com/ClusterLabs/resource-agents/archive/v3.9.6.tar.gz
- 安装glue
tar xf 0a7add1d9996.tar.bz2
cd Reusable-Cluster-Components-glue--0a7add1d9996/
./autogn.sh
./configure --prefix=/usr/local/heartbeat --with-daemon-user=hacluster --with-daemon-group=haclient --enable-fatal-warnings=no LIBS=‘/lib64/libuuid.so.1‘
make && make install
echo $?
- 安装Resource Agents
tar xf v3.9.6.tar.gz
cd resource-agents-3.9.6/
./autogen.sh
./configure --prefix=/usr/local/heartbeat --with-daemon-user=hacluster --with-daemon-group=haclient --enable-fatal-warnings=no LIBS=‘/lib64/libuuid.so.1‘
make && make install
echo $?
- 安装HeartBeat
tar xf 958e11be8686.tar.bz2
cd Heartbeat-3-0-958e11be8686/
./bootstrap
export CFLAGS="$CFLAGS -I/usr/local/heartbeat/include -L/usr/local/heartbeat/lib"
./configure --prefix=/usr/local/heartbeat --with-daemon-user=hacluster --with-daemon-group=haclient --enable-fatal-warnings=no LIBS=‘/lib64/libuuid.so.1‘
make && make install
echo $?
- 配置网卡支持插件文件
mkdir -pv /usr/local/heartbeat/usr/lib/ocf/lib/heartbeat/
cp /usr/lib/ocf/lib/heartbeat/ocf-* /usr/local/heartbeat/usr/lib/ocf/lib/heartbeat/
注意:一般启动时会报错因为 ping和ucast这些配置都需要插件支持 需要将lib64下面的插件软连接到lib目录 才不会抛出异常
ln -svf /usr/local/heartbeat/lib64/heartbeat/plugins/RAExec/* /usr/local/heartbeat/lib/heartbeat/plugins/RAExec/
ln -svf /usr/local/heartbeat/lib64/heartbeat/plugins/* /usr/local/heartbeat/lib/heartbeat/plugins/
5、配置Heartbeat
5.1 节点1配置
拷贝三个模版配置文件到 /usr/local/heartbeat/etc/ha.d 目录下。
cp doc/{ha.cf,haresources,authkeys} /usr/local/heartbeat/etc/ha.d/
- 配置ha.c文件
该配置文件用于配置跳。
vim /usr/local/heartbeat/etc/ha.d/ha.cf

debugfile /var/log/ha-debug  #表示调试的日志文件 一般测试建议开启
logfile /var/log/ha-log  #表示系统的的日志文件路径
logfacility     local0  #表示使用系统日志与上面只能开启一个
keepalive 2  #主备之间的心跳间隔时间单位:s
deadtime 30  #表示如果连接对方30s还无法连接,表示节点死亡需要考虑vip转移
warntime 10  #表示10s时间未收到心跳时发出警告日志
initdead 120  #有时机器启动后需要一段时间网卡才能正常工作 需要预留一定的时间后,再开始判断心跳检测
udpport 694  #多播的udp端口
#baud   19200  #串行端口的波特率
#serial /dev/ttyS0      # Linux  #串口的接口名
#serial /dev/cuaa0      # FreeBSD
#serial /dev/cuad0      # FreeBSD 6.x
#serial /dev/cua/a      # Solaris
#bcast  eth0            # Linux #传播心跳的广播网卡信息
#bcast  eth1 eth2       # Linux
#bcast  le0             # Solaris
#bcast  le1 le2         # Solaris
#mcast eth0 225.0.0.1 694 1 0  #多播传送心跳的网卡 多播组 端口 跃点数 是否回环内传送
ucast ens33 192.168.6.193 #设置单播心跳,设置对方的ip地址,此处使用单播
auto_failback on  #表示如果主机停止后,从机接管设置为on当主机从新启动后,主机立即接管vip off从机不会释放vip给主机
node    node1.heartbeat.com  #配置主从的节点信息,要与uname -n保持一致
node    node2.heartbeat.com
#############################################
#使用ping模式 有时当主机挂掉或者heartbeat挂掉后vip才会转移  有时出现某个进程挂掉 切换需要使用脚本
#ping模式用于测试 如果网卡ping不同 某个主机 就认为当前断网 需要转移vip
#respawn root     /usr/local/heartbeat/libexec/heartbeat/ipfail 表示当ping不通时 自动调用 ipfail这个脚本
#apiauth ipfail gid=haclient uid=hacluster 表示有权限操作ipfail脚本的组和用户
############################################
ping 192.168.6.1
#ping组的所有主机
#ping_group group1 10.10.10.254 10.10.10.253
#respawn userid /path/name/to/run
#指定与heartbeat一同启动和关闭的进程,该进程被自动监视,遇到故障则重新启动。最常用的进程是ipfail,该进程用于检测和处理网络故障,需要配合ping语句指定的ping node来检测网络连接。如果你的系统是64bit,请注意该文件的路径。
#respawn hacluster /usr/local/heartbeat/libexec/heartbeat/ipfail
#apiauth ipfail gid=haclient uid=hacluster
- 配置authkeys配置文件
该文件表示发送心跳时,机器用于验证的key的hash算法,节点之间必须配置成一致的密码。
vim /usr/local/heartbeat/etc/ha.d/authkeys
auth 2  #表示使用id为2的验证 下边需要定义一个2的验证算法
2 sha1 1a2b3c  #ID 2的验证加密为shal,并添加密码
更改权限为600
chmod 600 /usr/local/heartbeat/etc/ha.d/authkeys
- 配置haresources配置文件
该文件表示资源的管理,如果是主机,当主机启动后自动加载该文件中配置的所有启动资源,资源脚本默认在haresources同级目录下的resource.d目录下
vim /usr/local/heartbeat/etc/ha.d/haresources
#指定节点主机名,和VIP地址,以双冒号分隔资源,此处以apache为例进行配置
node1.heartbeat.com  192.168.6.190 apache::/etc/httpd/conf/httpd.conf
5.2 节点配置
在节点1上拷贝三个配置好的文件到节点2,只需修改ha.cf配置文件中的单播地址为对方地址即可(ucast ens33 192.168.6.192)。
scp authkeys ha.cf haresources root@node2:/usr/local/heartbeat/etc/ha.d/
6、启动heartbeat服务
启动每个节点的heartbeat服务
systemctl enable heartbeat
systemctl start heartbeat
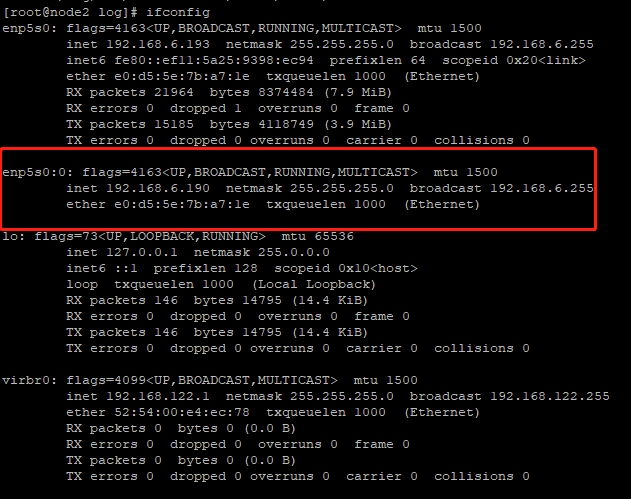
7、测试
测试VIP可用性 此时查看网络配置情况,可以看到enp5s0:0配置出现,实现了资源转移。
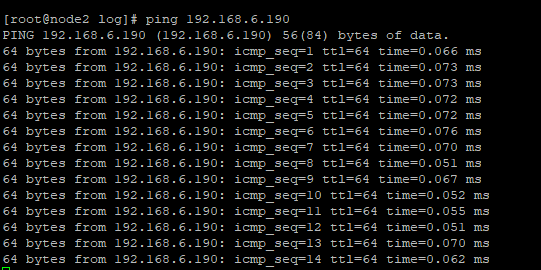
且VIP可以联通
模拟节点故障,测试服务可用性。
# curl http://192.168.6.190
<h1>Hello Host-A</h1>
#使用heartbeat自带脚本切换主备节点
# /usr/local/heartbeat/share/heartbeat/hb_standby
Going standby [all].
# curl http://192.168.6.190
<h1>Hello Host-B</h1>
说明HA工作正常。