Oh ! My ZSH !!!
时间:2021-03-16 13:54:23
收藏:0
阅读:0
zsh + oh my zsh 使用
目录
切换bash
切换bash
chsh -s /bin/bash
切换zsh
chsh -s /bin/zsh
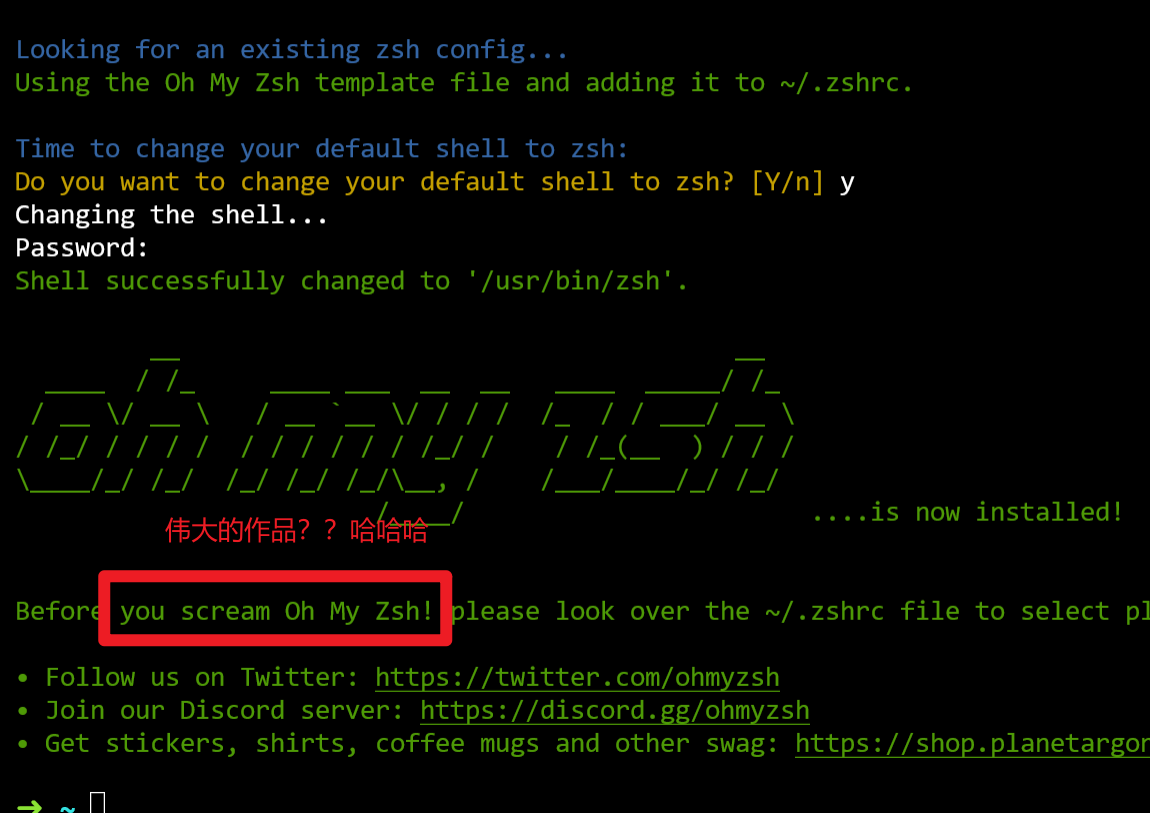
安装
oh my zsh !
插件地址
https://github.com/ohmyzsh/ohmyzsh/tree/master/plugins
主题地址(都有图片预览哦)
https://github.com/ohmyzsh/ohmyzsh/wiki/Themes
插件使用教程
autojump
https://github.com/wting/autojump
step1 安装 autojump(Ubuntu 18.04)
sudo apt-get install autojump
step 2 在 ~/.zshrc 文件种 配置 zsh 插件
写上插件
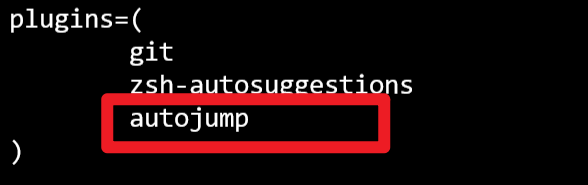
是插件胜生效
最后一行写

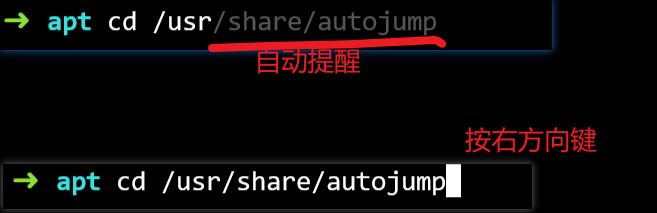
. /usr/share/autojump/autojump.sh
step 3 使配置文件生效
source ~/.zshrc
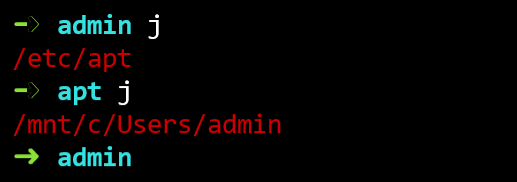
效果
zsh-autosuggestions (自动补全——记住过去,减少劳动)
https://github.com/zsh-users/zsh-autosuggestions
step 1 Clone this repository into $ZSH_CUSTOM/plugins (by default ~/.oh-my-zsh/custom/plugins)
https://github.com/zsh-users/zsh-autosuggestions/blob/master/INSTALL.md
git clone https://github.com/zsh-users/zsh-autosuggestions ${ZSH_CUSTOM:-~/.oh-my-zsh/custom}/plugins/zsh-autosuggestions
如图是下载的位置

step 2 Add the plugin to the list of plugins for Oh My Zsh to load (inside ~/.zshrc)
plugins=(zsh-autosuggestions)
step 3 生效
source ~/.zshrc
效果
zsh-syntax-highlighting (语法高亮)
https://github.com/zsh-users/zsh-syntax-highlighting
https://github.com/zsh-users/zsh-syntax-highlighting/blob/master/INSTALL.md
声明

step 1 下载
git clone https://github.com/zsh-users/zsh-syntax-highlighting.git ${ZSH_CUSTOM:-~/.oh-my-zsh/custom}/plugins/zsh-syntax-highlighting
step 2 将插件 写在 配置文件最后
zsh-syntax-highlighting
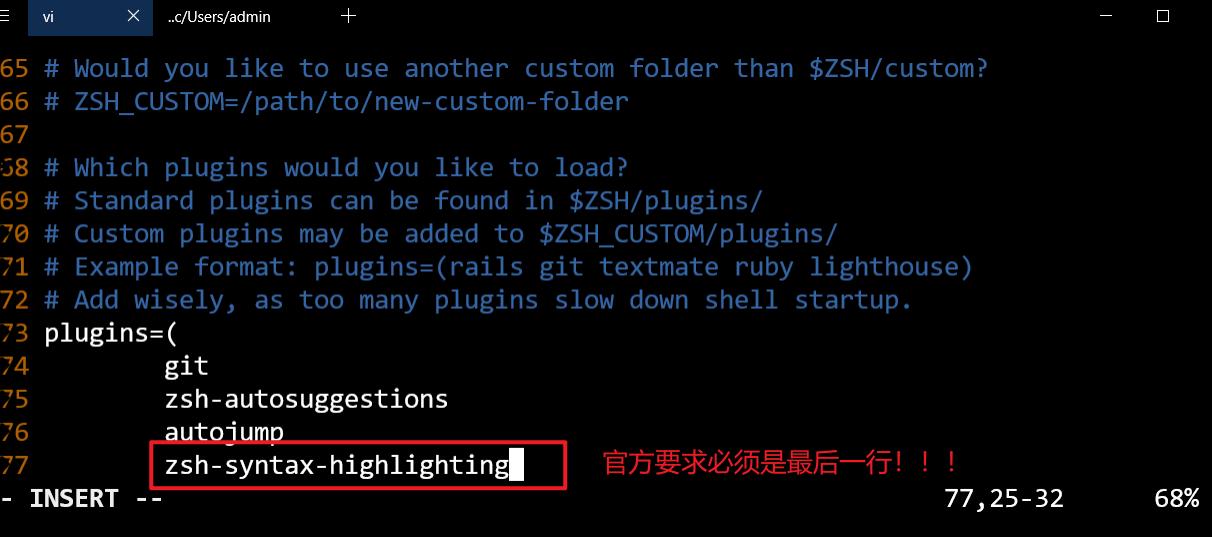
step 3 生效(同上)

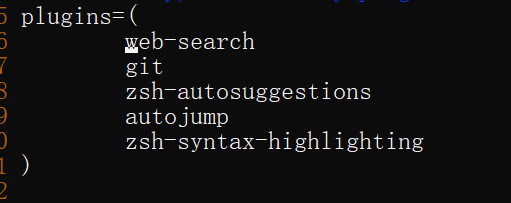
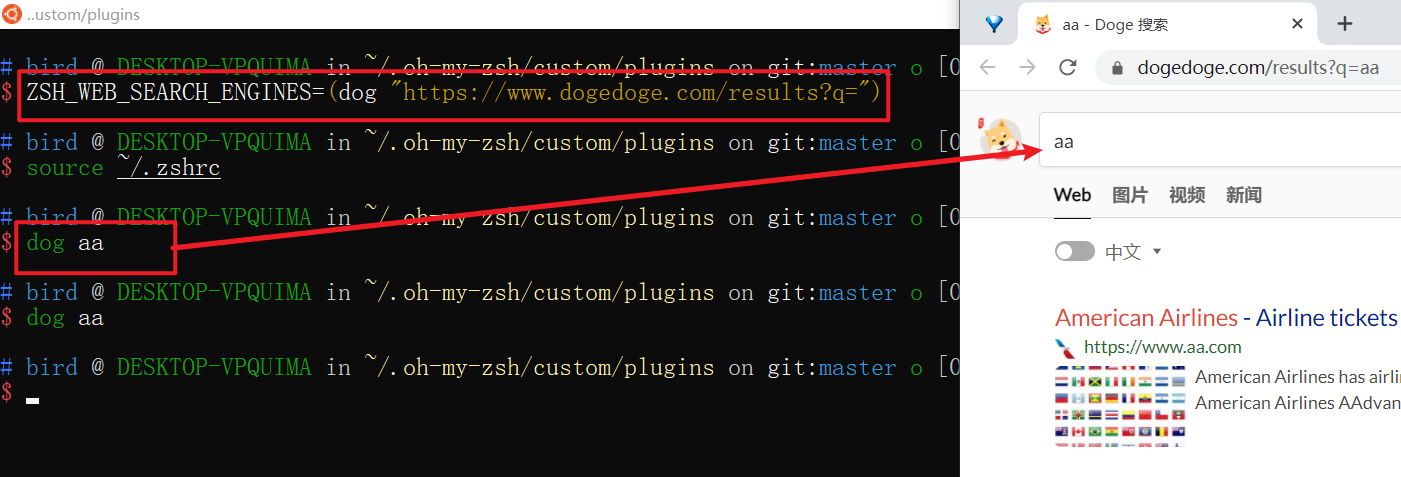
web-search
配置超级简单,直接写在这里就 ok
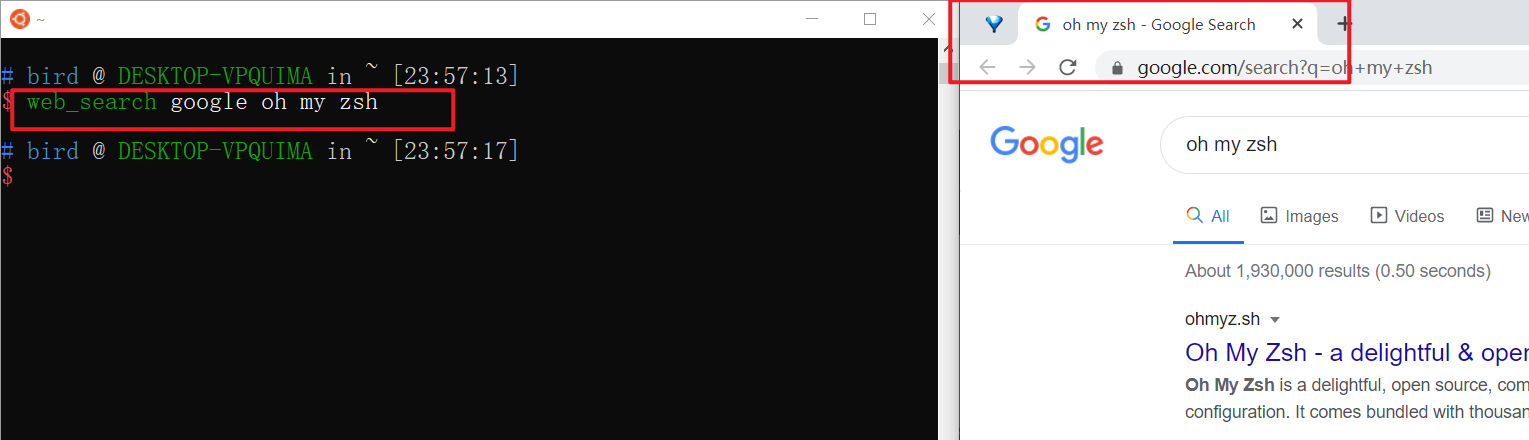
效果
web_search google xxx
或者
google xxx
配置搜索引擎
默认支持的搜索引擎
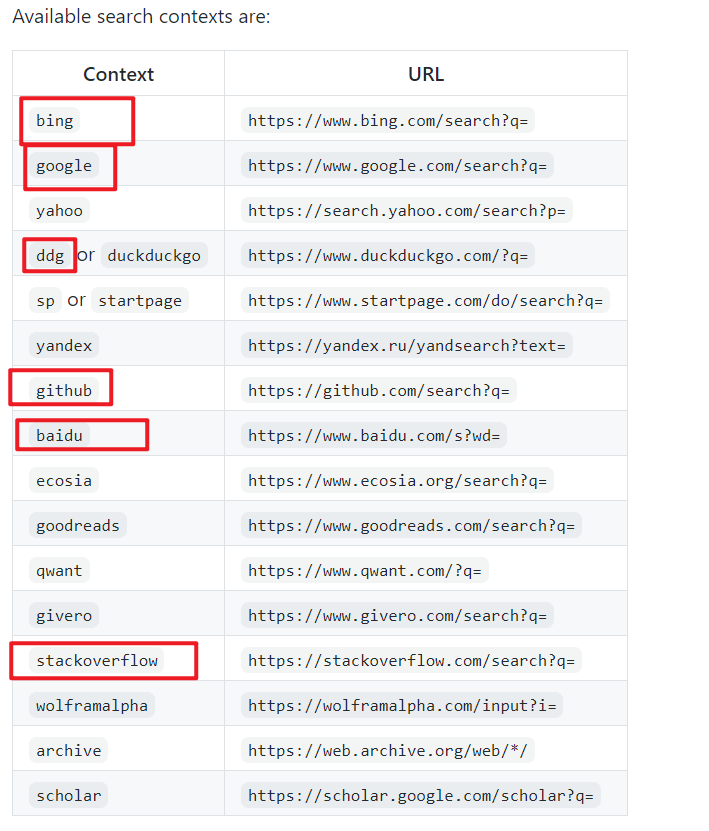
自定义 添加
主题选择
ys 主题
step1 自己预览官方提供的,当然太多了,我看看用到最多的
TODO_Lists
-
web-search 直接在终端使用浏览器搜索,可以百度 谷歌

评论(0)