微信小程序启动页的实现
时间:2020-09-15 21:07:30
收藏:0
阅读:57
加班偷着懒没做一堆九月份迭代的工作,实现了一下小程序的启动页。效果是这样的:
关注公众号查看效果

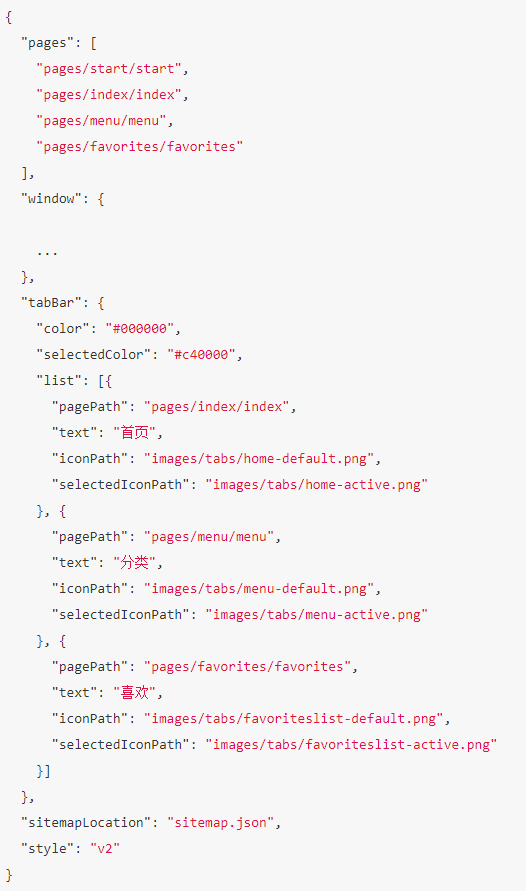
app.json
将启动页路径放在pages数组的第一项,tabBar中list正常放置。

start.wxml
先写一个容器显示背景图片,image标签上使用bindload方法,动态计算屏幕宽高,以适应不同手机端的尺寸,让背景图更佳显示。因为是云开发,图片刻意使用了云存储中图片资源,具体操作可回顾之前发布的 视 频 教 程。
<view wx:for=‘{{testList}}‘ wx:for-item="item" wx:key="item">
    <image src="{{item.fileID}}" bindload="autoImage" style="width:{{imgWidth}};height:{{ imgHeight }}" />
</view>
用户信息展示,整体用容器包起来,做成绝对定位。open-data 标签可以免权限直接拿到用户的昵称头像等信息,只需要指定相应的type即可。
<view class="userinfo">
    <view class="userinfo-avatar">
        <open-data type="userAvatarUrl"></open-data>
    </view>
    <view class="userinfo-name">
        <text>{{msg}}</text>
        <open-data type="userNickName"></open-data>
    </view>
    <button hover-class="btn_red" class="btn" bindtap="goToIndex">进入店铺</button>
</view>
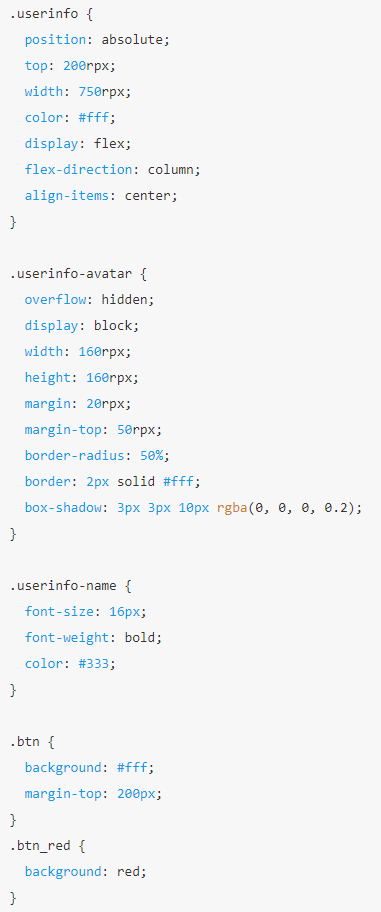
start.wxss
进入店铺按钮有一个悬停效果,使用hover-class定义一个目标效果的class。

start.js
autoImage 方法如下,欢迎白嫖。
autoImage(e) {
    var that = this;
    var originalWidth = e.detail.width;
    var originalHeight = e.detail.height;
    var imageWidth = 0;
    var imageHeight = 0;
    wx.getSystemInfo({
        complete: (res) => {
            var winWidth = res.windowWidth;
            if (originalWidth > winWidth) {
                var autoWidth = winWidth;
                var autoHeight = (autoWidth * originalHeight) / originalWidth;
                imageWidth = autoWidth + ‘px‘;
                imageHeight = autoHeight + ‘px‘;
            } else {
                imageWidth = originalWidth + ‘px‘;
                imageHeight = originalHeight + ‘px‘;
            }
            that.setData({
                imgWidth: imageWidth,
                imgHeight: imageHeight
            });
        }
    })
}
进入店铺按钮上绑定的事件,直接调用微信api,tab页跳转。
goToIndex() {
    wx.switchTab({
        url: ‘/pages/index/index‘,
    });
}
评论(0)
