微信小程序自定义tabBar
时间:2020-06-10 10:51:24
收藏:0
阅读:113
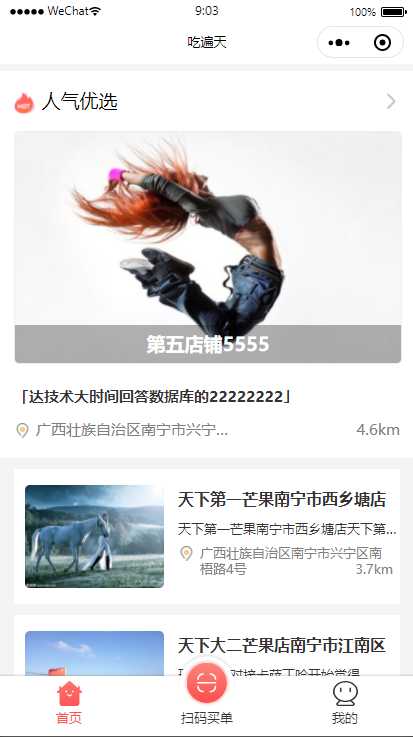
近期做个微信小程序项目,因项目设计需要,所以要做成自定义的tabBar才能实现设计效果图,具体效果如下图:

其中扫码买单,这个按钮效果,微信自带的tabBar是无法实现的,其后尝试了下custom-tab-bar 也是无法实现。
没办法了,既然微信的tabBar无法实现。那就自己弄个真-自定义tabBar来实现好了。
各位看官莫慌,下面就把解决方案放上来。首先先来讲下解决方案的思路,然后再把代码送上。
思路:
微信的tabBar无法实现,那么就放弃微信的tabBar,改用Component 来实现。把微信自带的tabBar隐藏起来,用Component 做成伪tabBar并应该到页面上。
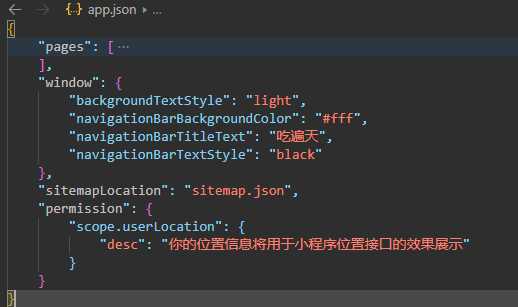
1、把app.json下的 tabBar 给干掉。这样在首页就不会有tabBar显示了。
2、写Component 伪tabBar并应该到页面上。
具体操作(代码)如下:
app.json删除 tabBar

写Component 伪tabBar
// Componet/tabBar/tabBar.js
Component({
    /**
     * 组件的属性列表
     */
    properties: {
        idx: {
            type: Number,
            value: 0
        },
    },
    /**
     * 组件的初始数据
     */
    data: {
        tabBar: [{
                "pagePath": "../../pages/index/index",
                "text": "首页",
                "switchQr": false,
                "iconPath": "/image/home.svg",
                "selectedIconPath": "/image/home_sel.svg",
            },
            {
                "pagePath": "",
                "text": "扫码买单",
                "switchQr": true,
                "iconPath": "/image/saoma.svg",
            },
            {
                "pagePath": "../../pages/user/user",
                "text": "我的",
                "switchQr": false,
                "iconPath": "/image/mine.svg",
                "selectedIconPath": "/image/mine_sel.svg",
            },
        ]
    },
    /**
     * 组件的方法列表
     */
    methods: {
        goToTab: function (e) {
            //如果点击当前页面则不进行跳转
            if (this.data.idx == e.currentTarget.dataset.index) {
                return false
            }
            wx.navigateTo({
                url: e.currentTarget.dataset.url
            })
        },
        // 扫码
        switchQr() {
            // console.log(‘扫码‘)

        },

    }
})
 1 <!--Componet/tabBar/tabBar.wxml-->
 2 <view class="tabBar">
 3     <view class="cont">
 4         <block wx:for="{{tabBar}}" wx:for-item="item" wx:key="tabBar">
 5             <view class="item {{item.switchQr?‘switchQr‘:‘‘}}" catchtap="{{!item.switchQr?‘goToTab‘:‘switchQr‘}}" data-url="{{item.pagePath}}" data-index="{{index}}">
 6                 <image class="ico" src="{{idx === index ? item.selectedIconPath : item.iconPath}}"></image>
 7                 <view class="txt {{idx === index ? ‘selectedColor‘ : ‘‘}}">{{item.text}}
 8                 </view>
 9             </view>
10         </block>
11     </view>
12 </view>
 1 /* Componet/tabBar/tabBar.wxss */
 2
 3 .tabBar {
 4     width: 100%;
 5     position: fixed;
 6     bottom: 0;
 7     font-size: 20rpx;
 8     color: #8A8A8A;
 9     background: #fff;
10     /* border-top: 2rpx solid #eee; */
11     box-shadow: 0rpx 1rpx 6rpx rgba(0,0,0,0.3);
12 }
13
14 .cont {
15     margin-top: 10rpx;
16     padding: 0;
17     z-index: 0;
18     height: calc(100rpx + env(safe-area-inset-bottom) / 2);
19     padding-bottom: calc(env(safe-area-inset-bottom) / 2);
20     display: flex;
21 }
22
23 .cont .item {
24     font-size: 24rpx;
25     position: relative;
26     flex: 1;
27     text-align: center;
28     padding: 0;
29     display: block;
30     height: auto;
31     line-height: 1;
32     margin: 0;
33     background-color: inherit;
34     overflow: initial;
35     justify-content: center;
36     align-items: center;
37 }
38
39 .cont .item .ico {
40     width: 46rpx;
41     height: 46rpx;
42     margin: auto
43 }
44
45 .cont .item .txt{
46     margin-top: 8rpx;
47     color: #333;
48 }
49
50 .cont .switchQr .ico {
51     position: absolute;
52     width: 106rpx !important;
53     z-index: 2;
54     height: 106rpx !important;
55     border-radius: 50%;
56     font-size: 50rpx;
57     top: -50rpx;
58     left: 0;
59     right: 0;
60     margin: auto;
61     padding: 0;
62
63 }
64 .cont .switchQr .txt{
65     margin-top: 56rpx;
66 }
67
68 .cont .item .selectedColor{
69     color: #ff4e4e;
70 }
在index/user的页面上应用。
1、要在index.json/user.json文件引用Componet
1 "usingComponents": {
2     "tabBar":"/Componet/tabBar/tabBar"
3   },
2、在页面的引用Componet
1 <!-- index.wxml -->
2 <tabBar idx="0"></tabBar>
3
4 <!--user.wxml -->
5 <tabBar idx="2"></tabBar>
评论(0)
