利用微信公众号实现商品的展示和支付(1)
在较早随笔《微信小程序结合后台数据管理实现商品数据的动态展示、维护》中介绍过使用小程序实现商品的展示,其实基于对应的接口,我们使用H5页面来开发基于公众号的商品展示和支付,也是产不多的原理,不过H5页面和小程序的界面处理代码有一些差异吧了,整体的实现思路倒是差不多的。本篇随笔介绍基于H5页面的开发,参照一些微店的展示页面,实现商品的展示和支付等操作。
1、商品的列表展示
和小程序一样的处理,我们首先需要利用微信开发框架的后台,对商品数据进行统一的录入和管理。并提供对应的接口让我们获取数据,就可以在前端获取进行展示了。我们可以都是基于一个Web API进行数据的处理操作,不管是小程序,还是公众号的H5页面,或者其他Web展示平台,我们都可以以一个统一的Web API接口来处理。
我们先来回顾了解下整体性的功能展示(小程序版本)。
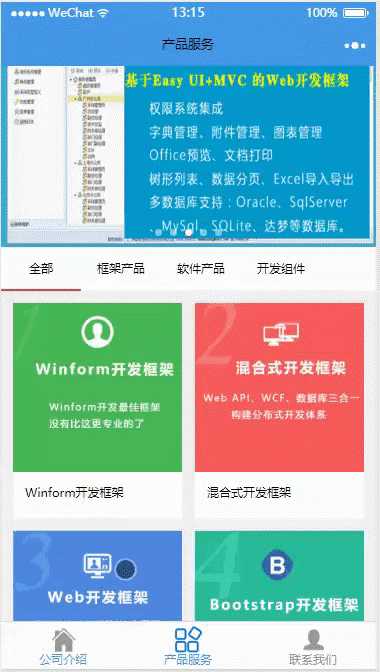
以上界面效果是之前使用小程序开发的,我们这次利用公众号H5页面做,也希望做成类似的布局和界面,可以稍作调整。
我们后台对商品数据进行维护,以便能够在实际应用中通过API来获取对应的商品数据。
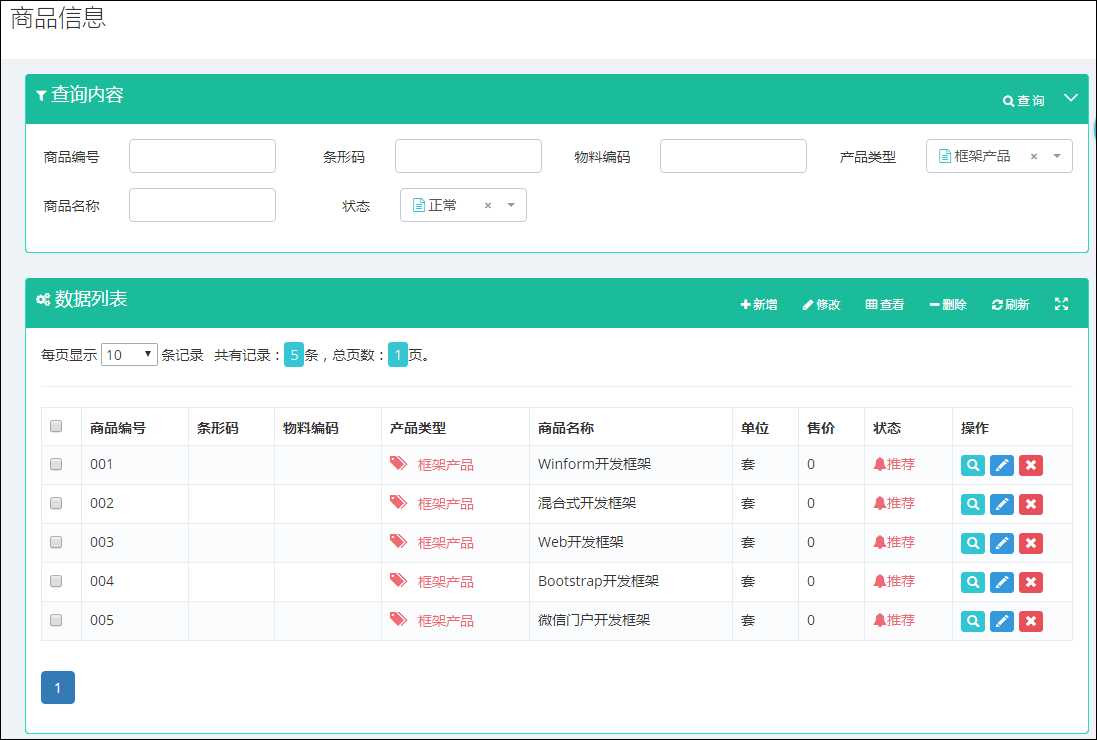
商品编辑界面包括对基础信息的修改、封面和Banner图片的维护、以及商品多个展示图片、商品详细介绍的内容维护,如下界面所示。
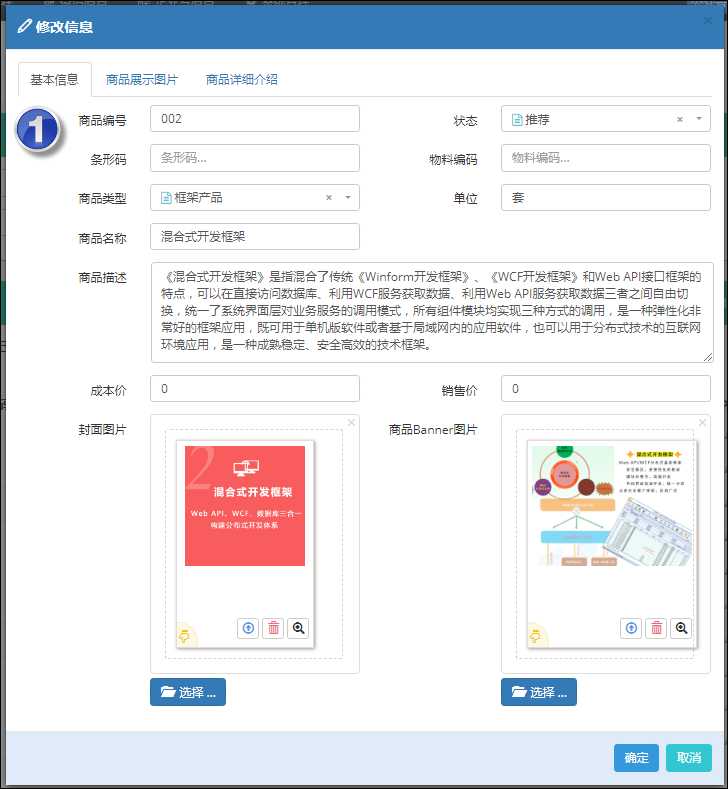
以上包括商品基础信息,轮播的展示图片,以及明细内容的维护,这些数据我们最终会通过JSON方式返回前端使用。
下图是小程序的商品展示首图,其中包括了顶部Banner栏目、中间的商品分类、底部的商品信息展示几部分。
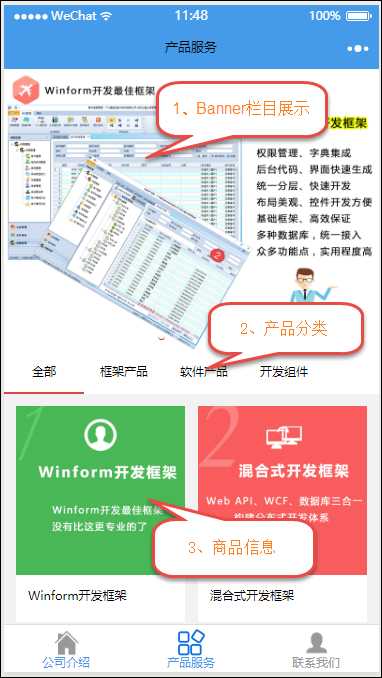
我们使用公众号H5的开发场景的时候,也希望大概做成类似的页面展示效果。
我们公众号处理一般使用一个对应的控制器来处理对应的页面视图或者数据接口,例如我这里使用H5Controller页面控制器。
我们先来定义一些常用到的视图入口页面。
    /// <summary>
    /// H5页面的处理操作控制(产品信息部分)
    /// </summary>
    public partial class H5Controller
    {
        /// <summary>
        /// 产品列表页面
        /// </summary>
        /// <returns></returns>
        public ActionResult ProductList()
        {
            return View("ProductList");
        }

        /// <summary>
        /// 产品详细页面
        /// </summary>
        /// <returns></returns>
        public ActionResult ProductDetail()
        {
            //JSSDK参数
            RefreshTicket();
            return View("ProductDetail");
        }

        /// <summary>
        /// 购物车页面
        /// </summary>
        /// <returns></returns>
        public ActionResult ShopCart()
        {
            //JSSDK参数
            RefreshTicket();
            return View("Shopcart");
        }
从上面的视图控制器代码,我们定义了ProductList.cshtml视图用来展示商品列表大类和商品列表的。
商品列表最终的界面效果如下所示。
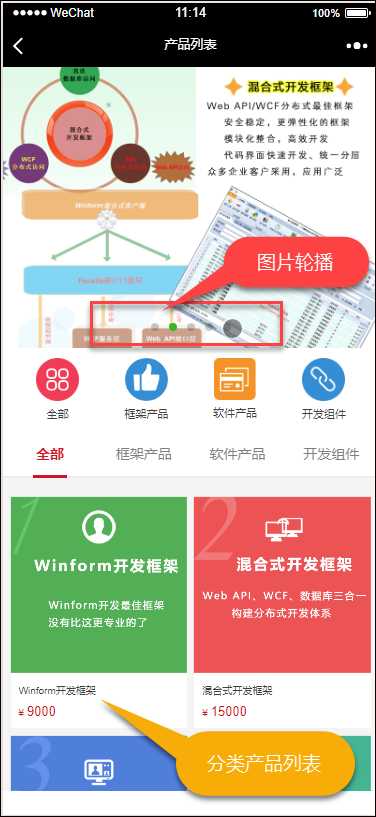
顶部的图片轮播,我们也是根据产品的属性来获取推荐产品的列表,然后展示对应的图片。
顶部轮播部分的页面代码如下所示
@{
    Layout = null;
}

<!DOCTYPE html>
<html>
<head>
    <meta charset="utf-8">
    <meta http-equiv="Content-Type" content="text/html; charset=utf-8" />
    <meta http-equiv="X-UA-Compatible" content="IE=edge">
    <meta name="viewport" content="width=device-width, initial-scale=1, user-scalable=no">
    <title>产品列表</title>
    <link rel="stylesheet" href="~/Content/wechat/web/lib/weui.min.css">
    <link rel="stylesheet" href="~/Content/wechat/web/css/jquery-weui.css">
    <link rel="stylesheet" href="~/Content/wechat/web/css/style.css" />
</head>
<body ontouchstart>
    <div class=‘weui-content‘>
        <!--顶部轮播-->
        <div class="swiper-container swiper-banner">
            <div class="swiper-wrapper" id="slide">
                @*<div class="swiper-slide"><a href="pro_info.html"><img src="~/Content/wechat/web/upload/ban1.jpg" /></a></div>
                <div class="swiper-slide"><a href="pro_list.html"><img src="~/Content/wechat/web/upload/ban2.jpg" /></a></div>*@
            </div>
            <div class="swiper-pagination"></div>
        </div>
其中高亮部分,就是我们需要动态构建的轮播图片代码,这里使用了注释,方便参考生成而已。
我们来看看轮播图片的异步加载代码。
//绑定Banner图片轮换
function BindBanners() {
    var url = "/H5/GetProductList";
    var data = {
        status: 1, //推荐
        pageindex: 1,
        pagesize: 10
    }
    //获取数据并绑定界面
    $.getJSON(url, data, function (result) {
        $("#slide").html("");
        var html = "";
        $.each(result.list, function (i, item) {
            html += `<div class="swiper-slide"><a href="/h5/ProductDetail?id=${item.ID}"><img src="${item.Banner}" style="width:100%;height:auto" /></a></div>`;
        });
        $("#slide").html(html);

        //设置循环时间
        $(".swiper-banner").swiper({
            loop: true,
            autoplay: 3000
        });
    });
}
可以看到,主要就是构建一个getJSON的请求处理,然后返回产品的JSON数据,对数据遍历进行生成HTML,然后给界面的元素赋值即可,后面大多数处理都是如此的做法。
由于是轮播处理,我们需要对对应的控件进行初始化,如下就是轮播的JS初始化设置。
//设置循环时间
$(".swiper-banner").swiper({
    loop: true,
    autoplay: 3000
});
对于产品列表,我们的页面视图代码如下所示。
<div class="weui-tab">
    <div class="weui-navbar" style="left:0; right:0; height:44px; background:#fff;">
        <a class="weui-navbar__item proinfo-tab-tit font-14 weui-bar__item--on" href="#tab1">全部</a>
        <a class="weui-navbar__item proinfo-tab-tit font-14" href="#tab2">框架产品</a>
        <a class="weui-navbar__item proinfo-tab-tit font-14" href="#tab3">软件产品</a>
        <a class="weui-navbar__item proinfo-tab-tit font-14" href="#tab4">开发组件</a>
    </div>
    <div class="weui-tab__bd proinfo-tab-con">
        <div id="tab1" class="weui-tab__bd-item weui-tab__bd-item--active">
            <div class="wy-Module">
                <div class="wy-Module-tit-line"></div>
                <div class="wy-Module-con">
                    <ul class="wy-pro-list clear">
                        @*<li>
                            <a href="pro_info.html">
                                <div class="proimg"><img src="~/Content/wechat/web/upload/pro1.jpg"></div>
                                <div class="protxt">
                                    <div class="name">洋河蓝色瓶装经典Q7浓香型白酒500ml52度高端纯粮食白酒2瓶装包邮</div>
                                    <div class="wy-pro-pri">¥<span>296.00</span></div>
                                </div>
                            </a>
                        </li>*@
                    </ul>
                </div>
            </div>
        </div>
        ......................
    </div>
</div>
上面我们主要就是根据产品的类别构建几个Tab选项卡,然后在其中的内容区域,动态获取数据,组装层类似加亮代码部分的产品信息列表即可。
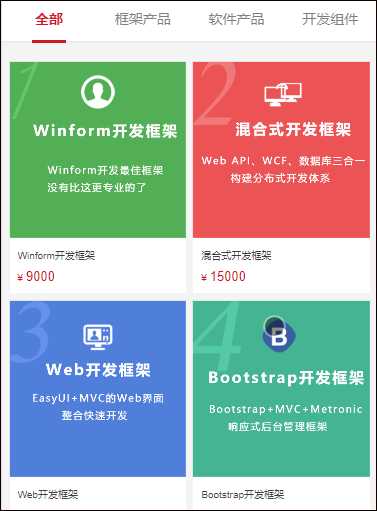
由于几个不同的Tab处理都需要进行分页获取 ,我们初始化一个DIV来做下拉页面进行分页数据展示区域,如下所示。
<div class="weui-loadmore">
    <i class="weui-loading"></i>
    <span class="weui-loadmore__tips">正在加载</span>
</div>
我们来看看获取产品列表的JS加载处理操作代码,可以看到我们依旧利用异步获取数据并绑定视图控件的方式。
        //绑定产品列表
        function BindProducts(pageindex) {
            if (categoryId == 0) {
                categoryId = "";
            }
            currentPage = pageindex;//设置当前的页吗

            //构建分页获取数据的请求信息
            var url = "/H5/GetProductList";
            var data = {
                type: categoryId,
                status: ‘‘, //所有状态
                pageindex: pageindex,
                pagesize: rows
            };
            //首页加载时候,清空信息处理
            if (pageindex == 1) {
                $(`${tabid} .wy-pro-list`).html("");
                $(".weui-loadmore").show();
            }

            //获取数据并绑定界面
            $.getJSON(url, data, function (result) {
                //$(`${tabid} .wy-pro-list`).html("");
                var html = "";
                $.each(result.list, function (i, item) {
                    html += `
                        <li>
                            <a href="/h5/ProductDetail?id=${item.ID}">
                                <div class="proimg"><img src="${item.Picture}"></div>
                                <div class="protxt">
                                    <div class="name">${item.ProductName}</div>
                                    <div class="wy-pro-pri">¥<span>${item.Price}</span></div>
                                </div>
                            </a>
                        </li>`;
                });
                $(`${tabid} .wy-pro-list`).append(html);

                //如果没有多余的数据,则隐藏“正在加载..”的提示
                if (result.list.length == 0) {
                    $(".weui-loadmore").hide();
                } else {
                    currentPage += 1;
                }
            });
        }

        //实现下拉分页刷新数据
        var loading = false;
        $(document.body).infinite().on("infinite", function () {
            if (loading) return;
            loading = true;
            setTimeout(function () {
                BindProducts(currentPage);
                loading = false;
            }, 2000);
        });
由于我使用了不同的Tab页面来承载不同的商品数据,那么我们单击不同的Tab的时候,需要处理不同的分类,如下代码所示。
$(function () {
    FastClick.attach(document.body);

    BindBanners();
    BindProducts(currentPage, "#tab1");

    $(‘.weui-navbar__item‘).on(‘click‘, function () {
        tabid = jQuery(this).attr("href");
        LoadTabData();
    });
});

//触发加载选项页面数据
function LoadTabData() {
    if (tabid == "#tab1") {
        categoryId = "0";
        BindProducts(1);
    } else if (tabid == "#tab2") {
        categoryId = "1";
        BindProducts(1);
    } else if (tabid == "#tab3") {
        categoryId = "2";
        BindProducts(1);
    } else if (tabid == "#tab4") {
        categoryId = "3";
        BindProducts(1);
    }
}
商品列表最终的界面效果如下所示。

2、商品的明细处理
前面介绍了商品的分类列表展示处理操作,商品的明细处理就是我们在单击某个商品的时候,进一步展示其图片和介绍内容,方便客户进行了解或者购买操作。
商品详细页面会带入一个id参数,然后页面根据对应的ID,加载详细的商品信息。
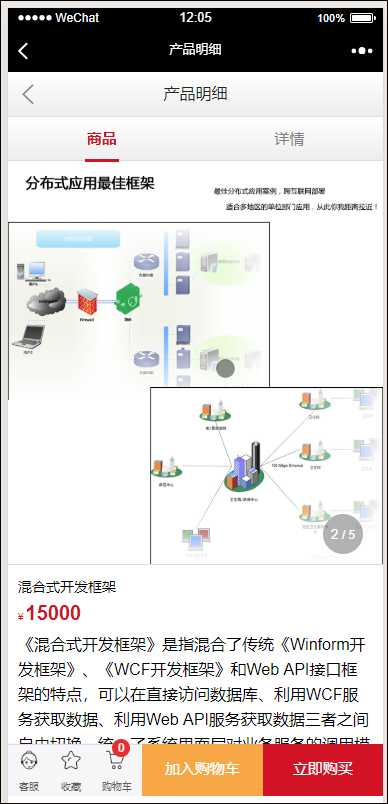
页面包括基础的介绍,和商品的详细HTML介绍内容,这些一样是可以在后台页面进行动态维护的。
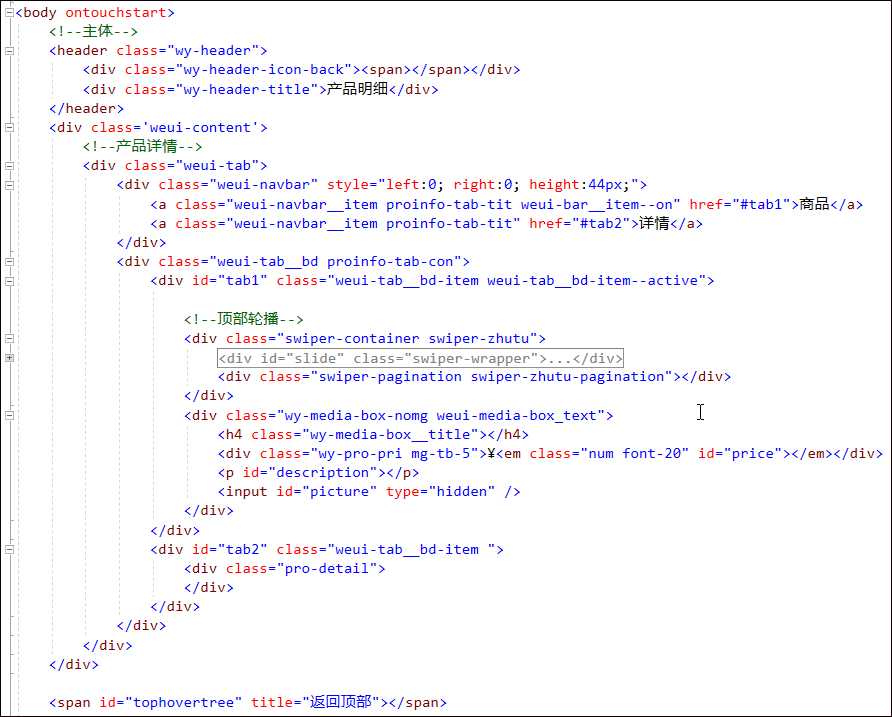
页面内容的处理,主要就是获取JSON加载产品明细的数据进行展示。
<script>
    $(function () {
        FastClick.attach(document.body);

        //头部返回按钮,返回主页
        $(".wy-header-icon-back").click(function () {
            location.href = "/h5/ProductList";
        });

        GetProductDetail();
        refreshShopCartNumber();
    });

    //绑定产品明细
    function GetProductDetail() {
        var url = "/H5/GetProductDetail";
        var data = {
            id: "@Request["ID"]"
        }
        //获取数据并绑定界面
        $.getJSON(url, data, function (result) {

            $("#slide").html("");
            var html = "";
            if (result.pics && result.pics.length > 0) {
                $.each(result.pics, function (i, item) {
                    html += `<div class="swiper-slide"><a href="javascript:;"><img src="${item.pic}" style="width:100%;height:auto" /></a></div>`;
                });
                $("#slide").html(html);
            }

            //设置循环时间
            $(".swiper-zhutu").swiper({
                loop: true,
                paginationType: ‘fraction‘,
                autoplay: 5000
            });

            $(".wy-media-box__title").text(result.ProductName);
            $("#description").text(result.Description);
            $("#price").text(result.Price);
            $("#picture").val(result.Picture);

            //产品详情
            $(".pro-detail").html(result.Note);
        });
    }
</script>
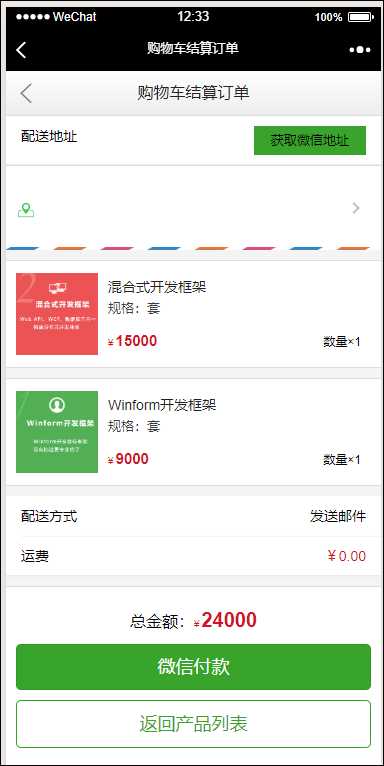
对于页面里面,还有购物车的处理和展示,以及购买支付的处理,我们留到下一个随笔进行细讲。
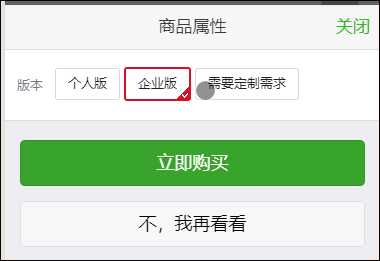
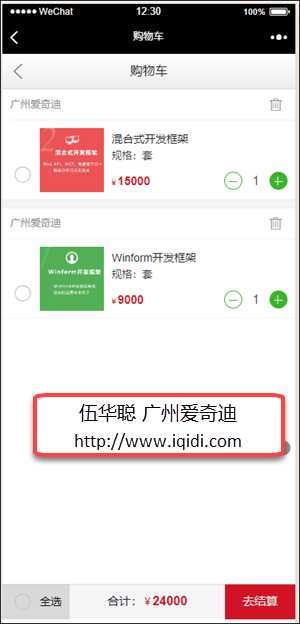
购物车列表
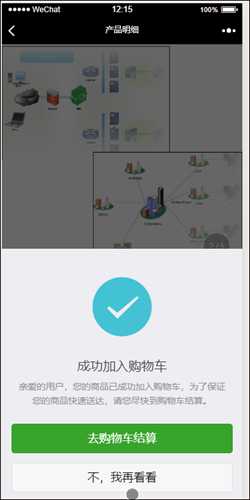
购买选择和确认
