使用Swagger来生成asp.net core Web API 文档
对于构建一个消费应用程序,理解API的各个方法对开发这是一个不小的挑战。为了使你的API更利于阅读。
使用Swagger为你的Web API生成好的文档和帮助页,.NET Core实现了Swashbuckle.AspNetCore,使用Swagger是非常简单的,只需添加一组Nuget包和修改Startup就可以搞定。
.Swashbuckle.AspNetCore 开源项目, ASP.NET Core Web API生成Swagger文档的
.Swagger是一个机器可读的restful风格的api接口的代表。他可以支持文档交互客户端sdk生成,并且具有可见性
1、入门
三个主要组件:
Swashbuck.AspNetCore.Swagger:Swagger对象模型和中间件,作为JSON终结点公开SwaggerDocument对象。
Swashbuckle.AspNetCore.SwaggerGen:一个Swagger生成器,可以直接从路由、控制器、模型构建SwaggerDocument对象。他通常和Swagger终结点中间件结合,以自动公开SwaggerJson
Swashbuckle.AspNetCore.SwaggerUI:Swagger UI工具的嵌入式版本,Swagger UI工具的嵌入式版本,它将Swagger JSON解释为构建丰富的,可定制的Web API功能描述体验。 它包括公共方法的内置测试线束。
2、通过下面命令安装这三个组件
可以使用下面方法添加Swashbuckle
Install-Package Swashbuckle.AspNetCore
3、添加并配置到Swagger到中间件
将Swagger生成器添加到Startup.cs的ConfigureServices方法中。
public void ConfigureServices(IServiceCollection services)
{
    services.AddDbContext<TodoContext>(opt => opt.UseInMemoryDatabase("TodoList"));
    services.AddMvc();
    //注册Swagger生成器,定义一个和多个Swagger 文档
    services.AddSwaggerGen(c =>
    {
        c.SwaggerDoc("v1", new Info { Title = "My API", Version = "v1" });
    });
}
Info类包含在Swashbuckle.AspNetCore.Swagger命名空间中。
在Startup.cs类的Configure方法中。启用中间件服务,主要生成JSON文档和SwaggerUI.
public void Configure(IApplicationBuilder app)
{
    //启用中间件服务生成Swagger作为JSON终结点
    app.UseSwagger();
    //启用中间件服务对swagger-ui,指定Swagger JSON终结点
    app.UseSwaggerUI(c =>
    {
        c.SwaggerEndpoint("/swagger/v1/swagger.json", "My API V1");
    });
    app.UseMvc();
}
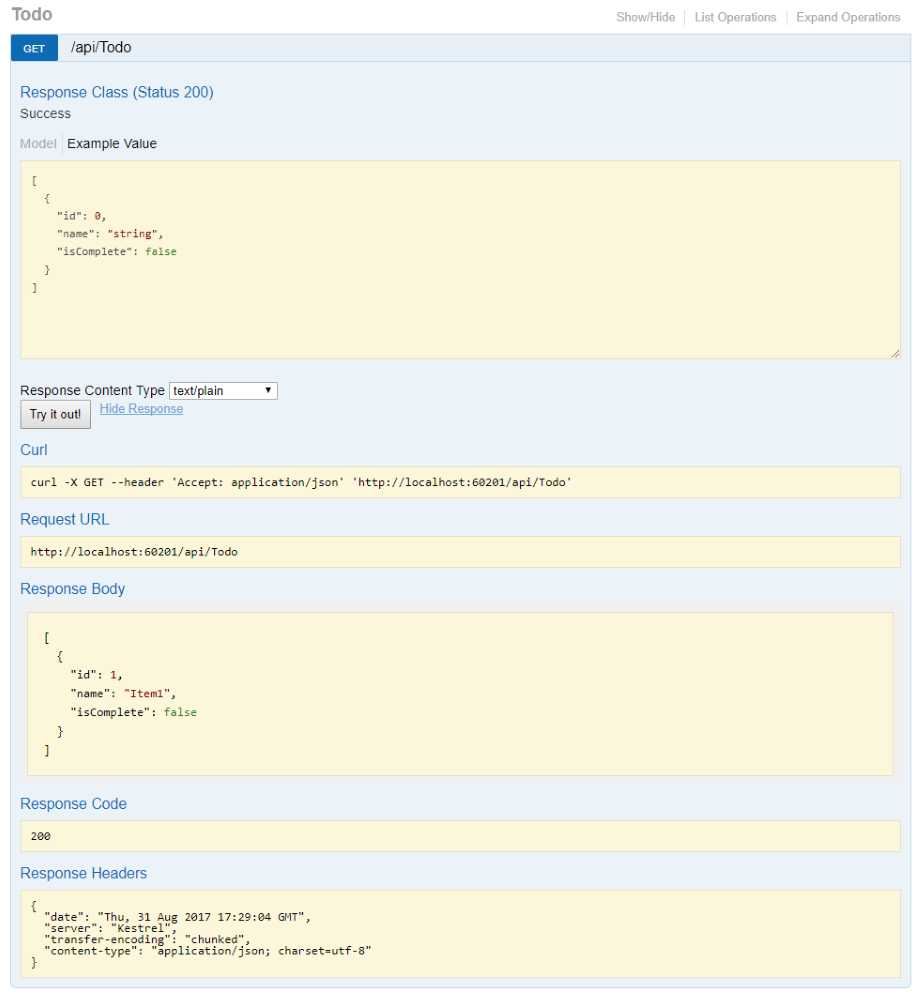
启动App,导航到http://localhost:<random_port>/swagger/v1/swagger.json ,显示描述终结点的文档。
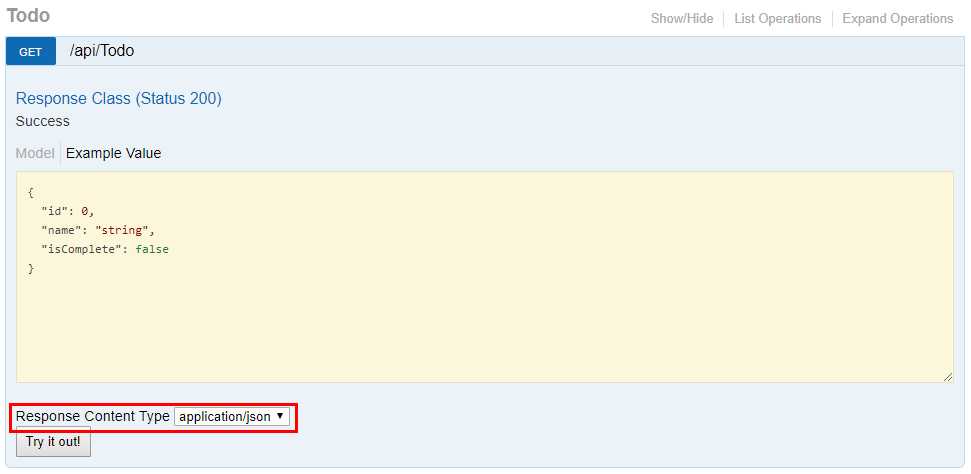
可以通过浏览http://localhost:<random_port>/swagger来查看生成的Swagger UI。

TodoController中的每个公共操作方法都可以从UI进行测试。单击一个方法名称可以展开节点。添加参数,单机"测试"!
4、定制和可扩展性
Swagger提供了用于记录对象模型和自定义UI。
API Info and Description
通过将一些信息传递给AddSwaggerGen方法,如author、license和description
services.AddSwaggerGen(c =>
{
    c.SwaggerDoc("v1", new Info
    {
        Version = "v1",
        Title = "ToDo API",
        Description = "A simple example ASP.NET Core Web API",
        TermsOfService = "None",
        Contact = new Contact { Name = "Shayne Boyer", Email = "", Url = "https://twitter.com/spboyer" },
        License = new License { Name = "Use under LICX", Url = "https://example.com/license" }
    });
});
下面图片描述了Swagger UI显示的版本信息

XML 注释
启用XML注释
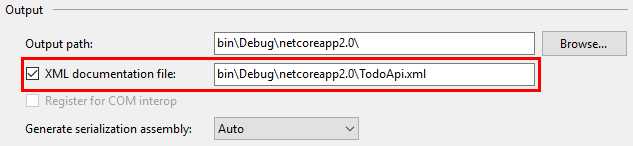
配置Swagger,让Swagger使用生成的XML文件。对于Linux和非Window操作系统,文件名和路径可以区分大小写。
public void ConfigureServices(IServiceCollection services)
{
    services.AddDbContext<TodoContext>(opt => opt.UseInMemoryDatabase("TodoList"));
    services.AddMvc();

    // Register the Swagger generator, defining one or more Swagger documents
    services.AddSwaggerGen(c =>
    {
        c.SwaggerDoc("v1", new Info
        {
            Version = "v1",
            Title = "ToDo API",
            Description = "A simple example ASP.NET Core Web API",
            TermsOfService = "None",
            Contact = new Contact { Name = "Shayne Boyer", Email = "", Url = "https://twitter.com/spboyer" },
            License = new License { Name = "Use under LICX", Url = "https://example.com/license" }
        });

        // Set the comments path for the Swagger JSON and UI.
        var basePath = PlatformServices.Default.Application.ApplicationBasePath;
        var xmlPath = Path.Combine(basePath, "TodoApi.xml");
        c.IncludeXmlComments(xmlPath);
    });
}
在前面的代码中,AppicationBasePath获取应用程序的基本了路径。用来查找XML注释文件.TodoApi.xml仅适用于此示例中,引文生成的XML注释文件的名称基于应用程序的名称。
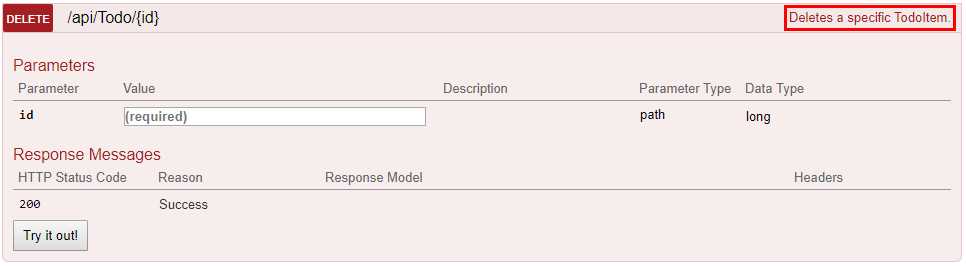
像下面方法添加注释
/// <summary>
/// Deletes a specific TodoItem.
/// </summary>
/// <param name="id"></param>
[HttpDelete("{id}")]
public IActionResult Delete(long id)
{
    var todo = _context.TodoItems.FirstOrDefault(t => t.Id == id);
    if (todo == null)
    {
        return NotFound();
    }

    _context.TodoItems.Remove(todo);
    _context.SaveChanges();
    return new NoContentResult();
}
在Create方法中添加下面注释
/// <summary>
/// Creates a TodoItem.
/// </summary>
/// <remarks>
/// Sample request:
///
///     POST /Todo
///     {
///        "id": 1,
///        "name": "Item1",
///        "isComplete": true
///     }
///
/// </remarks>
/// <param name="item"></param>
/// <returns>A newly-created TodoItem</returns>
/// <response code="201">Returns the newly-created item</response>
/// <response code="400">If the item is null</response>
[HttpPost]
[ProducesResponseType(typeof(TodoItem), 201)]
[ProducesResponseType(typeof(TodoItem), 400)]
public IActionResult Create([FromBody] TodoItem item)
{
    if (item == null)
    {
        return BadRequest();
    }

    _context.TodoItems.Add(item);
    _context.SaveChanges();

    return CreatedAtRoute("GetTodo", new { id = item.Id }, item);
}
Data Annotations
使用System.ComponentModel.DataAnnotations中的属性装饰模型,以帮助驱动Swagger UI组件。
将[Required]属性添加到TodoItem类的Name属性中:
using System.ComponentModel;
using System.ComponentModel.DataAnnotations;

namespace TodoApi.Models
{
    public class TodoItem
    {
        public long Id { get; set; }

        [Required]
        public string Name { get; set; }

        [DefaultValue(false)]
        public bool IsComplete { get; set; }
    }
}
此属性会更改UI行为并更改基础JSON模式:
"definitions": {
    "TodoItem": {
        "required": [
            "name"
        ],
        "type": "object",
        "properties": {
            "id": {
                "format": "int64",
                "type": "integer"
            },
            "name": {
                "type": "string"
            },
            "isComplete": {
                "default": false,
                "type": "boolean"
            }
        }
    }
},
将[Produces("application/json")]属性添加到API控制器。其目的是声明控制器返回类型支持application/json.
namespace TodoApi.Controllers
{
    [Produces("application/json")]
    [Route("api/[controller]")]
    public class TodoController : Controller
    {
        private readonly TodoContext _context;
随着Web API中数据注释的使用量的增加,UI和API帮助页面变得更具描述性和实用性。
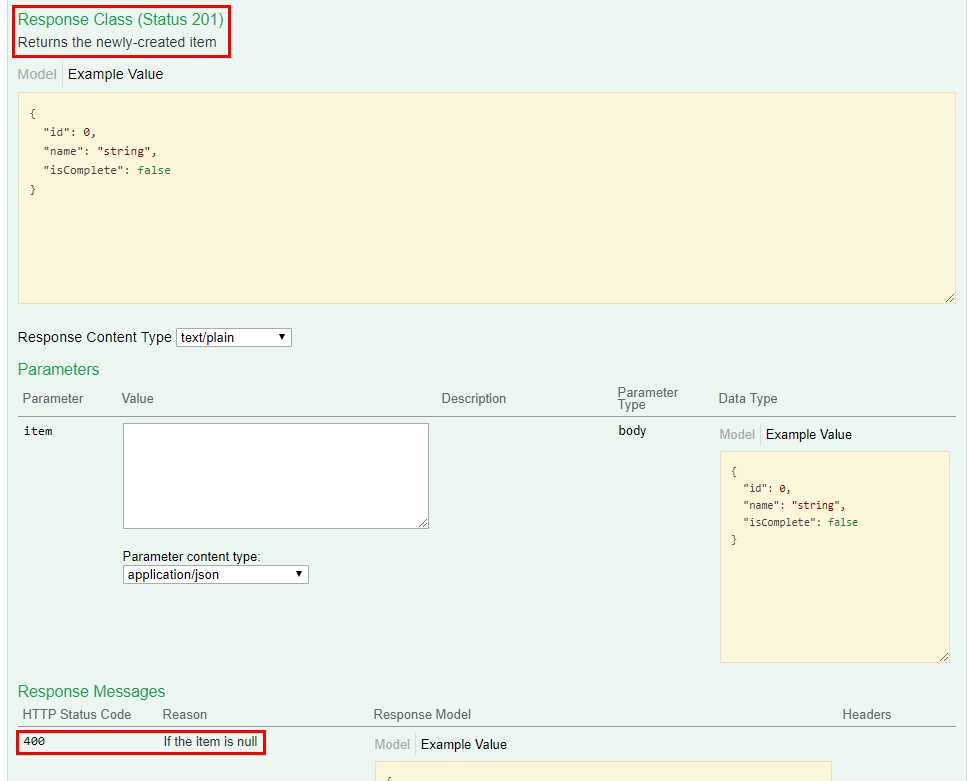
声明响应类型
使用API的人员最关心的是返回什么。特别是响应类型和错误代码
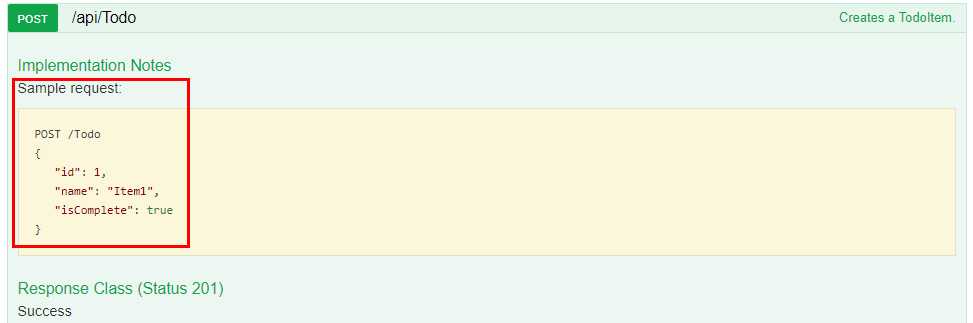
当请求为null时,Create 操作返回201创建成功和400 bad request.如果在Swagger UI中没有合适的文档。消费者就不了解这些结果。通过添加下面注释类解决
/// <summary>
/// Creates a TodoItem.
/// </summary>
/// <remarks>
/// Sample request:
///
///     POST /Todo
///     {
///        "id": 1,
///        "name": "Item1",
///        "isComplete": true
///     }
///
/// </remarks>
/// <param name="item"></param>
/// <returns>A newly-created TodoItem</returns>
/// <response code="201">Returns the newly-created item</response>
/// <response code="400">If the item is null</response>
[HttpPost]
[ProducesResponseType(typeof(TodoItem), 201)]
[ProducesResponseType(typeof(TodoItem), 400)]
public IActionResult Create([FromBody] TodoItem item)
{
    if (item == null)
    {
        return BadRequest();
    }

    _context.TodoItems.Add(item);
    _context.SaveChanges();

    return CreatedAtRoute("GetTodo", new { id = item.Id }, item);
}
Swagger UI现在清楚地记录了预期的HTTP响应代码: