安装Linux Mint
1、制作安装U盘后,选择非EFI模式启动;选择start Linux Mint(就是第一项);
2、Install Mint;依次选择安装选项,不要连接网络,否则安装时会下载语言包等,全部下载完成需要一个月左右,:(;
安装第三方软件;清除磁盘全新安装;主机名Terrans Force不解释;
3、安装成功后关机,拔掉U盘,开机后连接网络;设置软件源:在开始菜单里面搜索software source,图形设置即可(自动测速,选择最快的,一般中科大ustc的最快,Main和Base都选择中科大就行了);
4、安装中文输入法(参考 http://blog.csdn.net/sunzhenhua0608/article/details/32746335):
sudo add-apt-repository ppa:fcitx-team/nightly
或者
sudo add-apt-repository ppa:fcitx-team/stable
执行失败的话可以忽略,但是必须执行,否则执行下面两个命令失败:
sudo apt-get update
sudo apt-get install fcitx
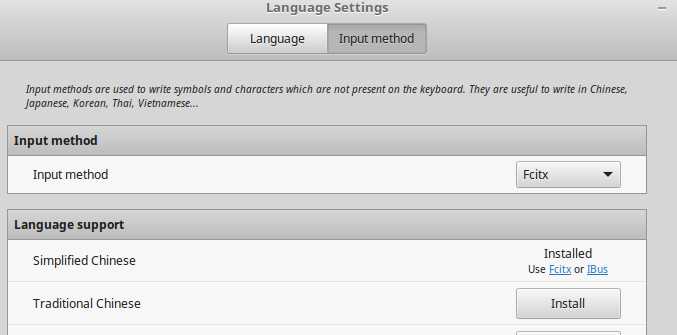
5、开始菜单中选择input method;输入方式选择fcitx && 安装简体中文;

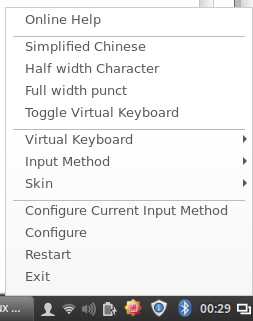
6、重启系统,右键输入法,选择配置:

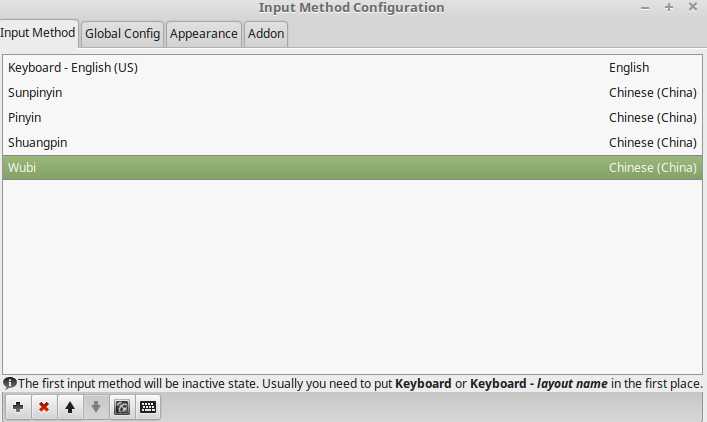
初始的配置如下:

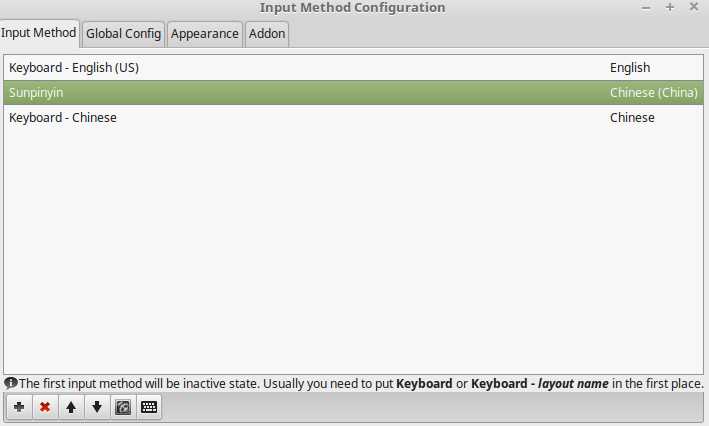
留下一个中文输入法,添加“键盘-汉语”输入法:(参考 http://tieba.baidu.com/p/2811713743?pn=1&statsInfo=frs_pager)

tips:
1、Mint的默认区域截图快捷键是:Shift+Ctrl+PrintScreen;不灵敏的话按稍长一点;
/**
1、
在ubuntu apt-get upgrade的时候,遇到:
E: Could not get lock /var/cache/
apt/archives/lock - open (11 Resource temporarily unavailable)
E: Unable to lock the download directory
解决办法如下:
sudo rm -rf /var/lib/dpkg/lock
sudo rm -rf /var/cache/apt/archives/lock
sudo apt-get update
然后apt-get就恢复正常了。
2、安装Adobe Flash
sudo apt-get update
sudo apt-get install flashplugin-installer
3、安装vlc
打开终端(快捷键Ctrl+Alt+T),输入下面的命令,
sudo add-apt-repository ppa:n-muench/vlc
sudo apt-get update
如果你并没有安装VLC,则还需要执行下面的命令。
sudo apt-get install vlc
4、安装迅雷xware
https://github.com/Xinkai/XwareDesktop/wiki/%E4%BD%BF%E7%94%A8%E8%AF%B4%E6%98%8E
Xware Desktop接受来自命令行的参数作为新任务的网址,格式为
xware-desktop http://www.website.com/file1 ftp://www.website.com/file2 ...
5、怎么查看自己电脑上有几个终端
sudo update-alternatives --config x-terminal-emulator
6、安装vim,解决上下左右问题:
ubuntu预装的是vim tiny版本,而需要的是vim full版本。执行下面的语句安装vim full版本:
$sudo apt-get remove vim-common
$sudo apt-get install vim
暂时的解决办法是使用:set nocompatible,但是每次都要设置。
7、设置默认终端窗口大小
cd .config/terminator/
vi config
在parent=""下面追加
size = 600,720
即可。
8、安装虚拟Windows
http://jingyan.baidu.com/article/eae07827856ac21fed54856f.html
和虚拟机的windows通讯:
在windows上安装winscp,连接linux的ip;
在linux上安装sshd
依次执行即可:
sudo apt-get update
sudo apt-get install openssh-server
sudo service ssh restart
Alt+Ctrl+上下左右:切换工作空间
9、增加命令别名
新增如下文件添加
alias ..=‘cd ..‘
即可:
vi ~/.bash_aliases
source ~/.bashrc
命令行执行:alias ll="ls -l"即时生效但是该命令在重新登录后将会丢失;
可以保存在用户目录下的.bashrc文件中,不过需要用户重新登录后才会生效,可以用source ~/.bashrc(或者 . ~/.bashrc)使修改立刻生效;
建议用户设置的别名放置在~/.bash_aliases里面,.bashrc会执行该新建的文件。
10、多个工作区的快捷键:
11、source Insight编码问题:
以前没有发现,最近把自己的代码靠到同学电脑上运行报错,发现是字符集的问题,一般来说 eclipse默认的是GBK编码,而ubuntu上默认是没有GBK编码的,所以ubuntu eclipse
上自然就没有 GBK 了,为了方便就手动添加了GBK编码
1:sudo geidt /var/lib/locales/supported.d/local
,在文件中添加:
zh_CN.GBK GBK
zh_CN.GB2312 GB2312
zh_CN.GB18030 GB18030
2: sudo dpkg-reconfigure locales
3:进入eclipse,点击window==>preferences==>general==>workspace中的Textfileencoding设置成GBK或者GB2312或者GB18030.(如果在other中没有出现编码列表,直接输
入指定的编码即可)
http://www.cnblogs.com/snake-hand/p/3155472.html
12、安装mysql
sudo apt-get install mysql-server
sudo apt-get install mysql-client
3. sudo apt-get install libmysqlclient-dev
13,install nutStore
tar zxvf nutstore_linux_src_installer.tar.gz
cd nutstore_linux_src_installer
27 ./configure
32 sudo pacman -S libnautilus-extension
33 ./configure
34 make
35 sudo make install
36 nautilus -q
37 ./runtime_bootstrap
14,install python2
wget https://www.python.org/ftp/python/2.7.12/Python-2.7.12.tgz
48 xz -d Python-2.7.12.tar.xz
50 tar xvf Python-2.7.12.tar
53 cd Python-2.7.12
//Python的详细安装方式参考:http://blog.csdn.net/ab198604/article/details/8681851
55 ./configure
56 make
58 python --version
59 sudo make install
60 which python
64 ls -l /usr/bin/python
66 ls -l /usr/local/bin/python
67 which python2
68 which python3
72 find . -name "nutstore-py*"
74 vi .nutstore/dist/bin/nutstore-pydaemon.py
75 nano .nutstore/dist/bin/nutstore-pydaemon.py 改第一行为#!/usr/bin/env python2
至此坚果云可顺利打开。。
15,using eclipse view code
import autotools Project;
then specify the code path. > better than import makefile Project.
also can File->Open File to Edit non-code Files.
16、开启manjaro的ssh(就可以打开Xshell和winscp了)
Manjaro安装ssh,然后可以Xshell管理:只使用$ systemctl start sshd 就行了。
$ su
$ pacman -S openssh
$ systemctl enable sshd
$ systemctl start sshd
17、manjaro安装eclipse:
软件包放在Downloads文件夹下:
cd Downloads
mkdir -p /opt/eclipse4c++
tar zxvf ...tar.gz -C /opt/eclipse4c++
cd /opt/eclipse4c++
./eclipse &
18、ln -s
ln -s /opt/eclipse/eclipse ~/Desktop/eclipse4c++
必须是全路径
